Getting started with Tapestry

Create an Account

Its easy and FREE

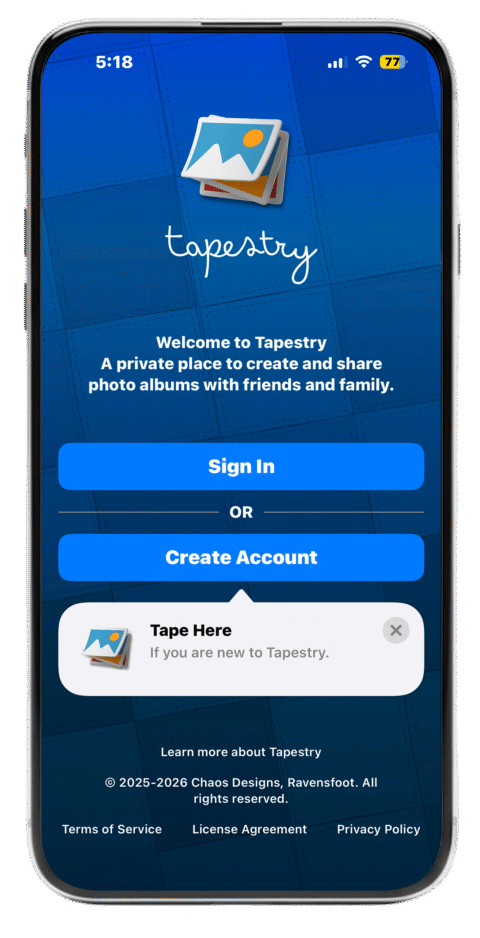
Once you have downloaded and installed Tapestry Show on your mobile device or tablet, you will be presented with a Sign In / Create Account welcome page. 

If this is your first time using Tapestry Show, tap the "Create Account" button to get started, no credit card needed and there is a free-tier that never expires with basic upload limits. You will receive a confirmation email sent to the email address you used for creating your account. On rare occasions this confirmation email can end up in your junk mail so be sure to check there if you don't see it.  

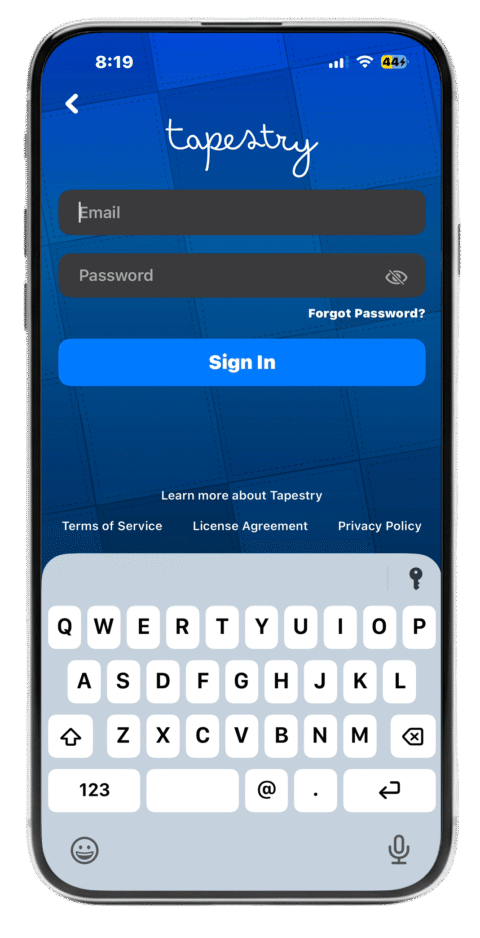
After you have created and confirmed your account and you open Tapestry Show, tap the "Sign In" button to get started.


Download on the Apple App StoreDownload on Google Play
Download Tapestry for free and start sharing today
Welcome to Tapestry iOS

Sign In

Your shows are secured with your Sign In Credentials

To Sign In, enter the email and password you created when creating your account.
Tapestry Sign In iOS

Step 1

Your first Show

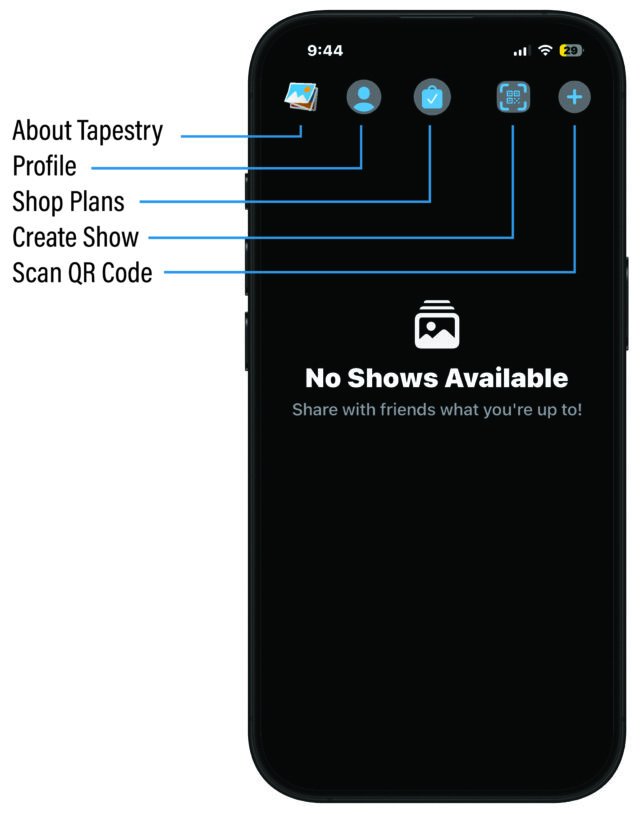
Once you have confirmed your email address, Tapestry will load your Shows List.

You can explore the different options on the main screen to view the About Tapestry page, Your Profile Settings, Your current Tapestry Plan and Scanning QR codes.

Tap the Plus "+" Icon to create a New Show.

Step 2

Naming your Show

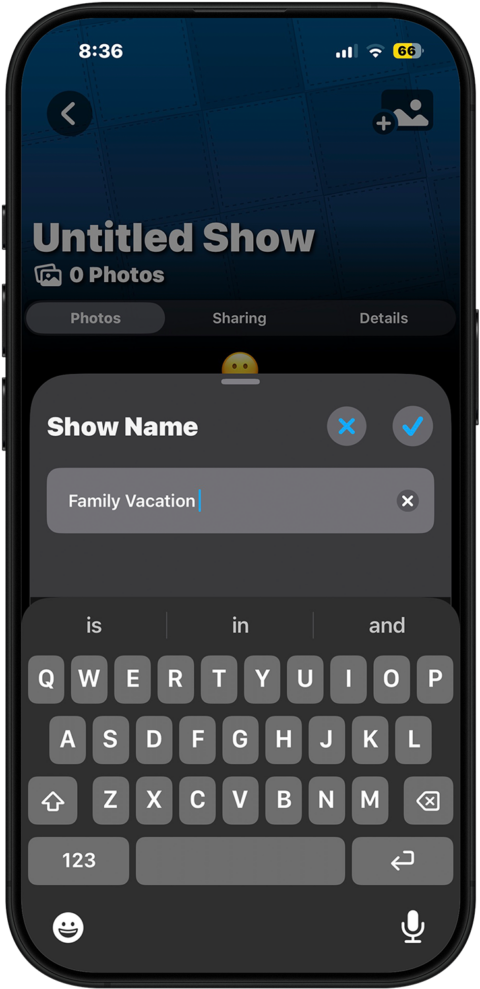
You can enter a name for your show that describes what the show is for. Example "Family Vacation"

Tap the Check Mark icon to save the show name.
Show name in Tapestry

Step 3

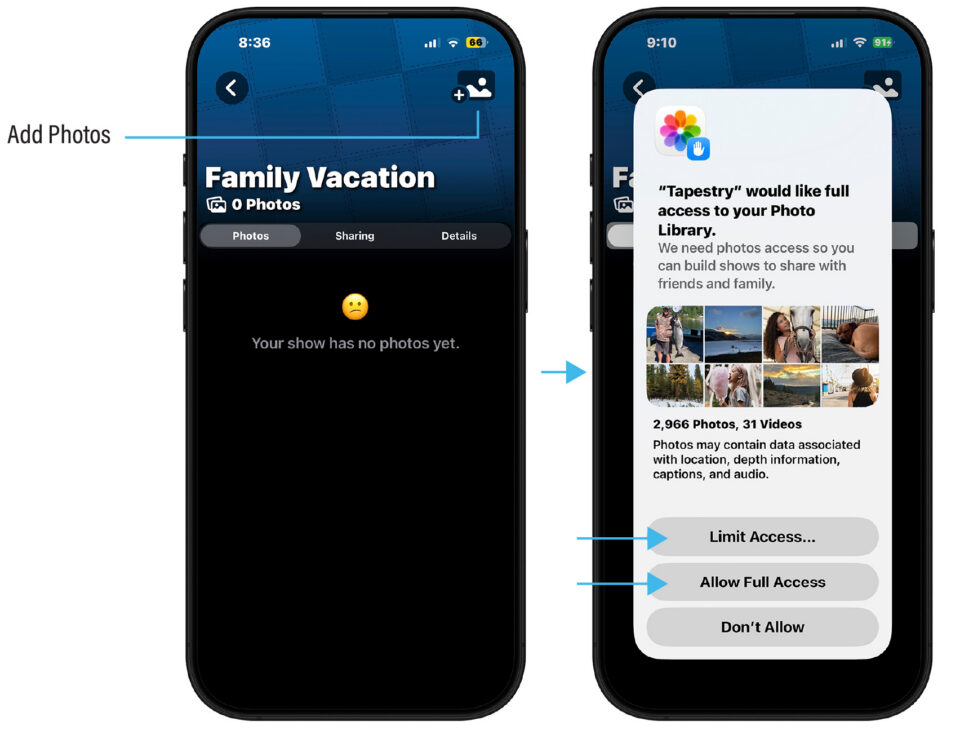
Adding Photos

To add photos to your Show, tap the photo+ icon. If you haven't given Tapestry permission to access photos yet, a permission pop-up will appear.

Select either "Limit Access" or "Allow Full Access" button.

You will then have the option to select the photos to upload to your show. 

Step 4

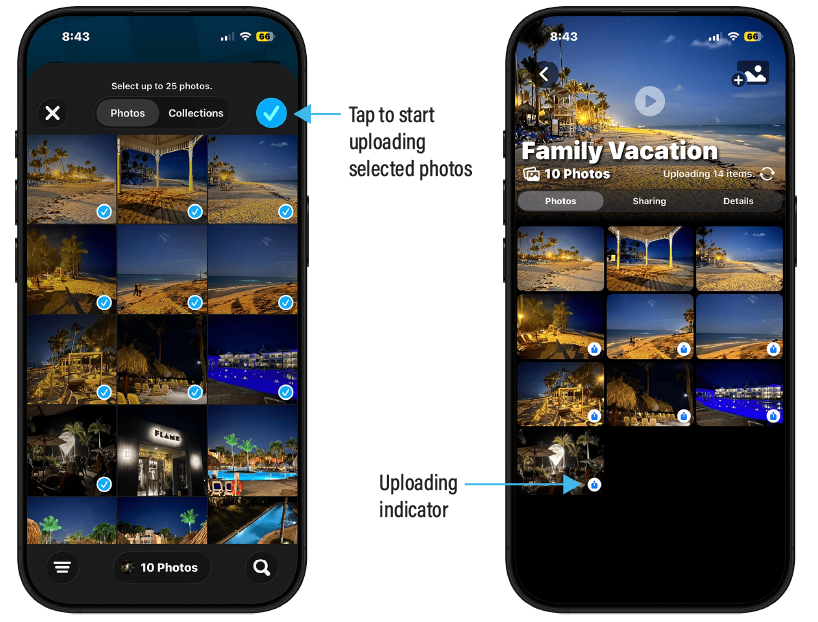
Selecting Photos

Tap each photo to select for uploading and then tap the checkmark button to start the upload process.

As the photos upload, an uploading icon appears in the lower right of each thumbnail.

Uploading icon disappears when photo is finished uploading.
Tapestry add photos

Step 5

Sharing your Show

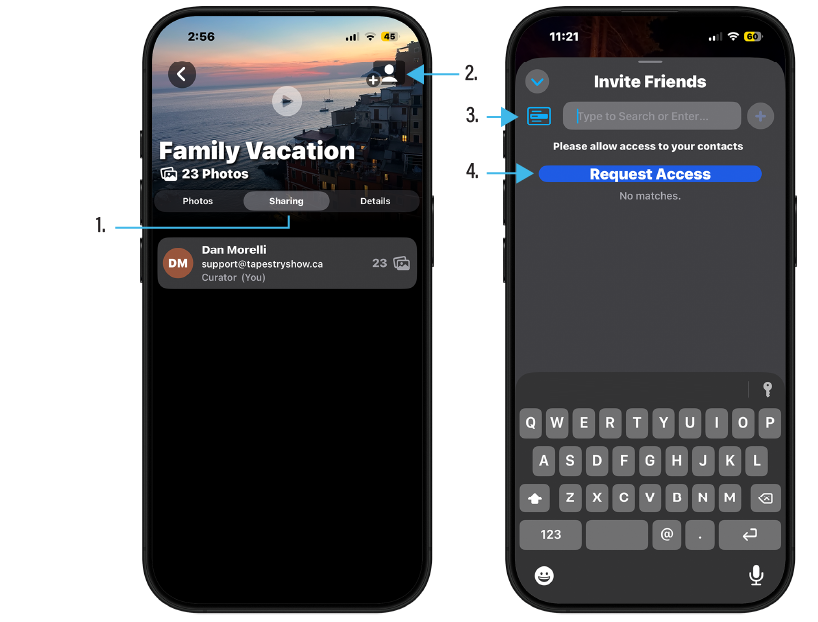
To share your show with friends and family, 

1. Tap the Sharing tab.
2. Tap the Add Person icon
3. Start typing or tap the contact list icon, or
4. Tap "Request Access" button to allow tapestry to show all of your contacts.

A permissions screen will pop up. 

Tap "Continue" or "Allow Access" depending on the screen that appears.
Tapestry sharing a show

Adding contacts

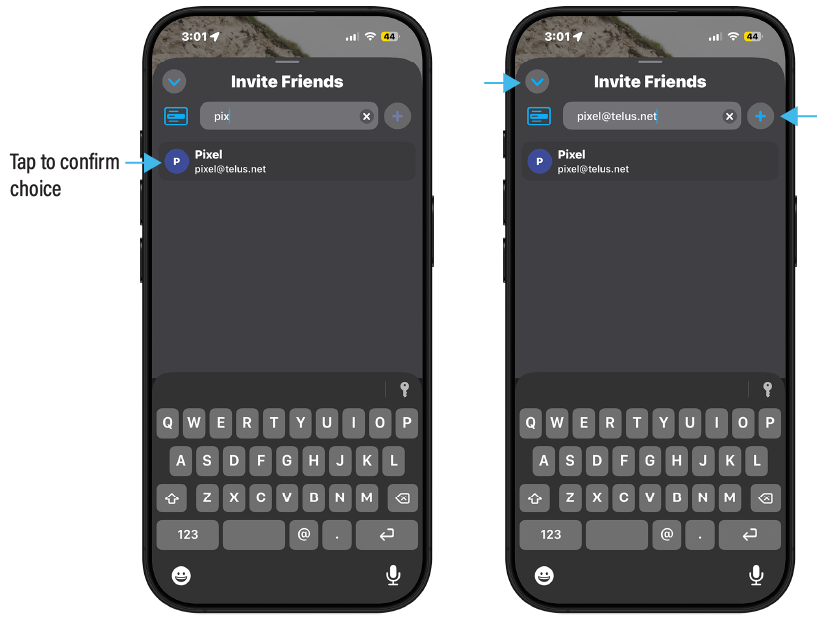
When typing in a name or email address, your available contacts will start to appear.

When you see a contact that matches your choice, tap the contact in the list.

Then tap the "+" icon to add that contact.

You can continue adding contacts that you wish to invite to your show.

Tap the "Down Arrow" icon to complete the Sharing.  You can always add more at any time using these steps.

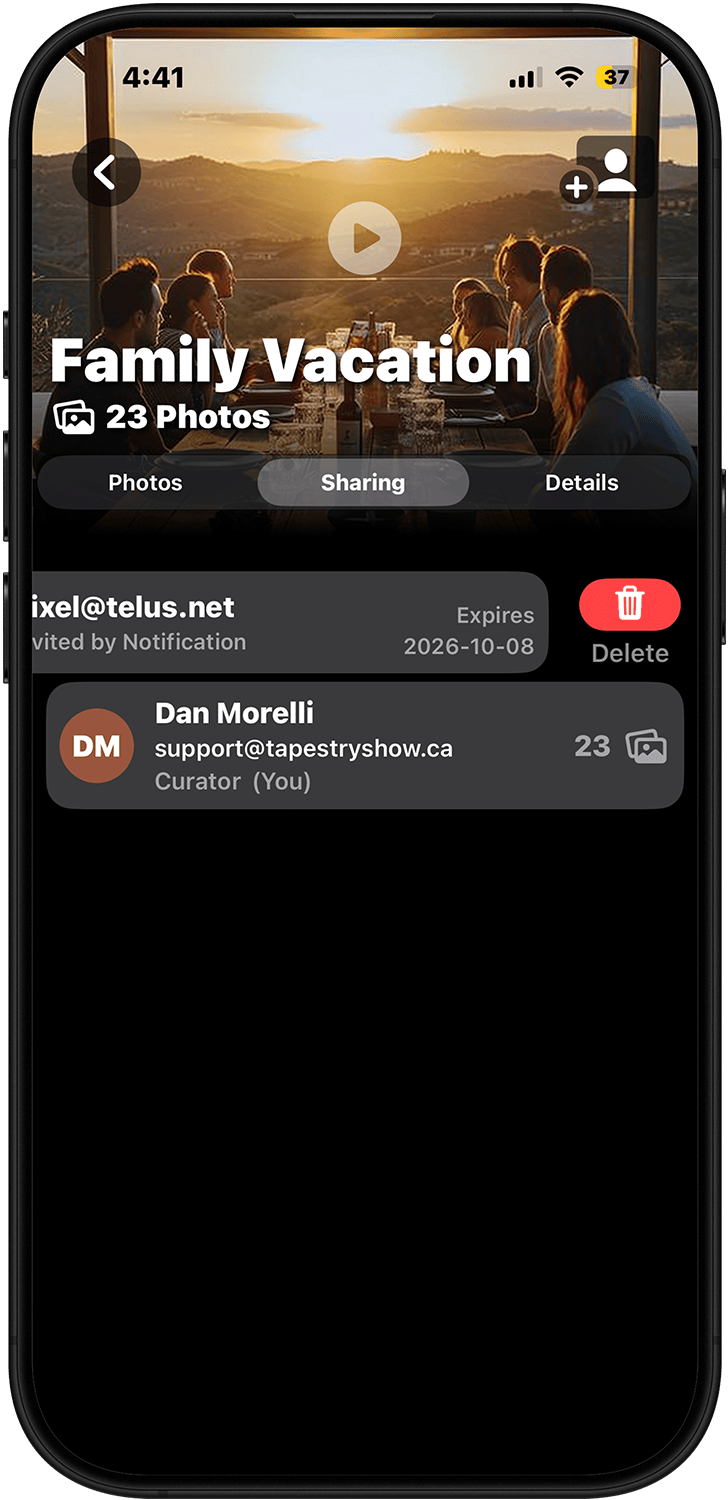
Your list of shared invites and how they were invited will be shown under the "Sharing" tab.

Removing s shared person

You can remove any Shared invite at any time by swiping left on the contact in the list and tapping the Trash Can icon.
Removing an invited person

Shows

All your shows in one place

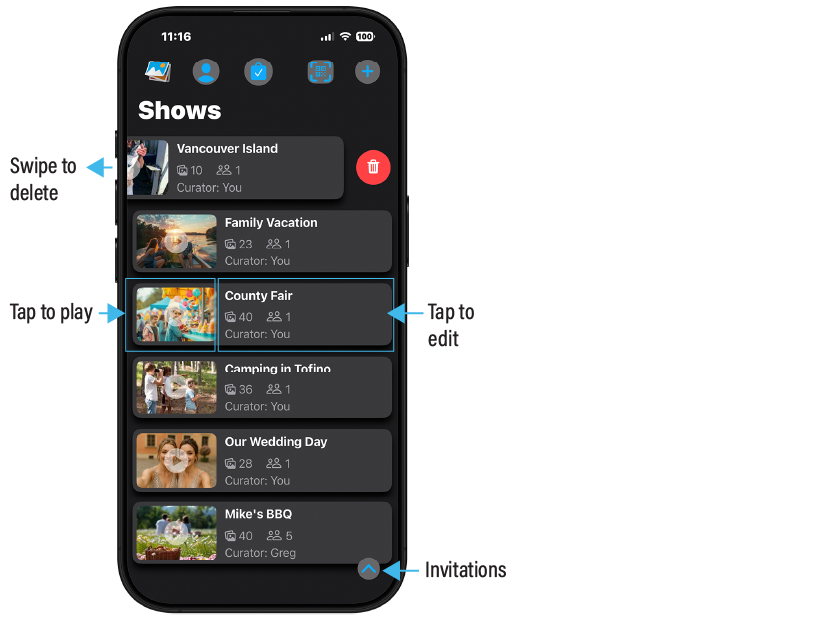
Shows are listed in the main screen.

Tap a show thumbnail to play.
Tap the Show name to edit.

When you have been invited to a show, your invitations can be displayed by tapping the icon in the lower right of the Show screen.

To delete a Show, swipe left on the show and tap the trash icon.
crossmenuchevron-right